Online Plants NZ
Indoor plants not only add a touch of natural elegance to your living space but also offer numerous health and psychological benefits. The act of nurturing these living organisms can be incredibly rewarding, contributing to improved air quality and a sense of tranquility. However, proper care is essential to ensure your indoor plants thrive. In this guide, we’ll provide you with the best guidance and tips to help you master the art of indoor plant care.
- Choose the Right Plants: Before embarking on your indoor gardening journey, it’s crucial to select plants that are well-suited to your space and lifestyle. Consider factors such as light availability, humidity, and the amount of care required. Some popular indoor plant options include pothos, snake plant, peace lily, spider plant, and succulents.
- Light Matters: Light is one of the most critical factors influencing a plant’s growth. Different plants have varying light requirements. Place sun-loving plants near windows with bright, indirect sunlight, while low-light plants can thrive in corners with minimal light. Consider rotating your plants occasionally to ensure even growth and prevent leaning towards the light source.
- Find the Right Spot: Each plant has its preferences when it comes to temperature and humidity levels. Research the optimal conditions for your landscape plants and place them accordingly. Grouping plants with similar requirements together can create microclimates that mimic their natural habitats.
- Water Wisely: Overwatering is a common mistake that can lead to root rot. Water your plants when the top inch of soil feels dry to the touch, and ensure proper drainage by using pots with drainage holes. Be mindful of plants’ water needs during different seasons and adjust your watering schedule accordingly.
- Humidity Control: Many indoor plants thrive in humid environments. To increase humidity, you can mist your plants, place a tray filled with water and pebbles near them, or invest in a room humidifier. However, avoid over-humidifying, as excessive moisture can lead to mold growth.
- Soil Selection: Choosing the right soil mix is vital for your plants’ health. Most indoor plants do well in well-draining potting mixes. You can also amend your soil with perlite or vermiculite to improve drainage. Repot your plants when they outgrow their containers to provide fresh nutrients and space for growth.
- Fertilize Regularly: Indoor plants benefit from regular feeding, especially during their growing season (typically spring and summer). Use a balanced liquid fertilizer or a slow-release granular fertilizer according to the plant’s requirements. Avoid over-fertilizing, as this can lead to nutrient imbalances.
- Pruning and Deadheading: Pruning helps maintain the shape and health of your plants. Remove dead or yellowing leaves to redirect the plant’s energy towards new growth. Some plants also benefit from deadheading—removing spent flowers—to encourage continuous blooming.
- Pest Management: Keep a vigilant eye out for pests like aphids, mealybugs, and spider mites. Early detection is key to preventing infestations. Regularly inspect the undersides of leaves and the soil. Introduce natural predators like ladybugs or use organic insecticidal soap to control pests.
- Mindful Repotting: As your plants grow, they may become root-bound or outgrow their containers. Repotting provides fresh soil and more space for their roots to expand. Choose a slightly larger pot with drainage holes, gently remove the plant from its old pot, and place it in the new one with fresh soil.
Conclusion
Caring for indoor plants can be a therapeutic and fulfilling experience. By understanding the unique needs of your plants and providing them with the right conditions, you can create a flourishing indoor garden that brings both beauty and serenity to your living space. Remember that every plant is a living being, and attentive care will reward you with a vibrant and thriving green oasis. Happy gardening!
Online Plants NZ
Peace lilies are popular houseplants known for their elegant beauty and air-purifying qualities. With their glossy dark green leaves and striking white flowers, peace lilies can add a touch of serenity and freshness to any indoor space. In addition to their aesthetic appeal, these plants are relatively easy to care for, making them an excellent choice for both beginner and experienced gardeners. In this blog post, we will guide you through the essential steps to help you successfully grow and care for your peace lily plants.
- Selecting the Right Location
Peace lilies thrive in bright, indirect light. While they can tolerate low light conditions, they will not bloom as profusely. Place your peace lily near a north or east-facing window where it can receive filtered sunlight. Avoid exposing the plant to direct sunlight, as it can scorch the leaves.
- Providing Optimal Temperature and Humidity
Peace lilies prefer average room temperatures between 65-85°F (18-29°C). Avoid placing them near cold drafts or heating vents. Maintaining a humidity level of around 40-50% is ideal for peace lilies. You can increase humidity by placing a tray of water near the plant or by using a humidifier.
- Watering and Drainage
Proper watering is crucial for the health of your peace lily. Water the plant thoroughly when the top inch of soil feels dry to the touch. Peace lilies prefer slightly moist soil but can be sensitive to overwatering. Avoid allowing the plant to sit in standing water, as this can lead to root rot. Ensure that your pot has drainage holes to prevent waterlogging.
- Fertilizing and Nutrient Requirements
Peace lilies are light to moderate feeders. Use a balanced, water-soluble fertilizer at half the recommended strength once a month during the growing season (spring and summer). Avoid over-fertilizing, as it can cause leaf burn. During the dormant season (fall and winter), reduce or cease fertilization.
- Pruning and Propagation
Regular pruning helps maintain the appearance and health of your peace lily. Remove any yellow or brown leaves and spent flowers. If the plant becomes crowded, you can divide it during the spring months. Carefully separate the plant into smaller clumps, ensuring that each division has healthy roots and leaves. Repot each division into a suitable container with fresh, well-draining potting mix.
- Troubleshooting Common Issues
Peace lilies can encounter a few common problems. Browning leaf tips may indicate low humidity or over-fertilization. Wiping the leaves with a damp cloth or misting them can help increase humidity. Yellowing leaves can signal overwatering or inadequate drainage. Adjust your watering habits and ensure proper drainage. If you notice pests such as aphids or spider mites, gently wipe the leaves with a soapy water solution or use an insecticidal soap.
Conclusion
Growing and caring for peace lily plants can be a rewarding and enjoyable experience. By providing the right conditions of light, temperature, and humidity, along with appropriate watering and fertilization, your peace lily will thrive and reward you with its lush foliage and beautiful flowers. Remember to regularly prune and propagate your plant, and promptly address any issues that may arise. With a little attention and care, your peace lily will continue to bring tranquility and beauty to your indoor space for years to come.
Online Plants NZ
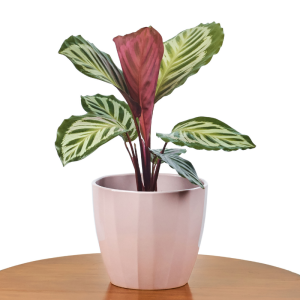
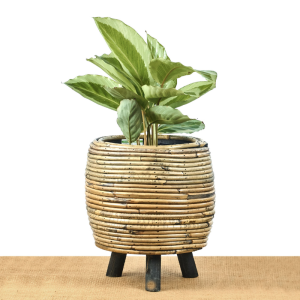
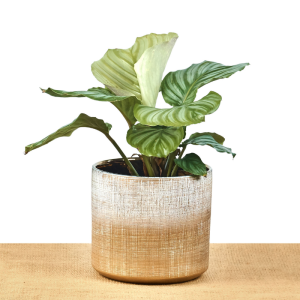
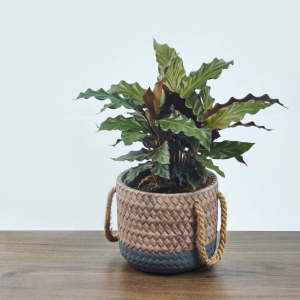
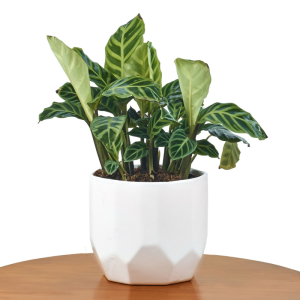
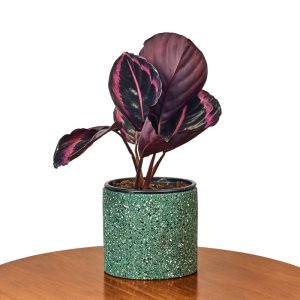
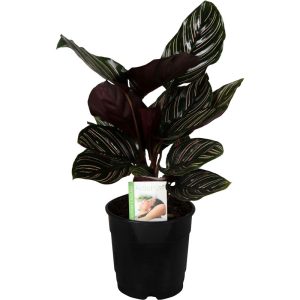
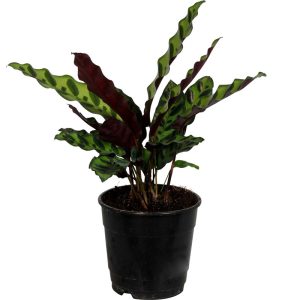
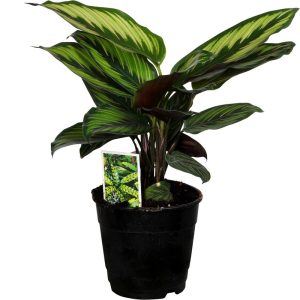
Calathea plants are known for their stunning foliage and unique patterns, making them a popular choice for indoor gardening enthusiasts. With their vibrant colors and intricate designs, these tropical plants can transform any space into a lush and captivating oasis. However, caring for Calathea plants can be a bit challenging, as they require specific conditions to thrive. In this comprehensive Calathea plant care guide, we will delve into the essential aspects of maintaining these beautiful plants, ensuring they stay healthy and vibrant in your home or office.
- Understanding Calathea Plants
Calathea plants belong to the Marantaceae family and are native to the tropical regions of South America. They are popular for their decorative leaves, which feature striking patterns, often resembling brush strokes or intricate lacework. Calathea varieties include Calathea orbifolia, Calathea medallion, Calathea lancifolia, and Calathea rattlesnake, among others. These plants are renowned for their ability to “pray,” as their leaves fold up during the night and open again in the morning.
- Light and Temperature Requirements
Calathea plants prefer bright but indirect light. They thrive in environments with medium to low light conditions, as direct sunlight can scorch their leaves. Placing them near an east or north-facing window is ideal. Temperature-wise, Calathea plants prefer warmth and thrive in temperatures between 65°F to 80°F (18°C to 27°C). Avoid exposing them to cold drafts or sudden temperature fluctuations, as this can cause leaf damage.
- Proper Watering Techniques
Maintaining proper watering habits is crucial for the health of your Calathea plant. These plants prefer consistently moist soil, but they are susceptible to root rot if overwatered. Water your Calathea plant when the top inch of soil feels slightly dry. Use filtered or distilled water to prevent mineral buildup, which can harm the plant. Avoid allowing the plant to sit in standing water, as this can lead to root rot.
- Humidity and Mist
Calathea plants are native to humid environments, so replicating high humidity levels is essential for their well-being. They thrive in humidity levels around 60% to 70%. To increase humidity, you can use a humidifier or place the plant on a tray filled with pebbles and water, ensuring the water does not touch the pot’s bottom. Regularly misting the leaves with water will also help maintain the required humidity levels.
- Soil and Fertilization
Calathea plants prefer well-draining soil that retains moisture without becoming waterlogged. A mix of peat moss, perlite, and potting soil is an excellent choice. Avoid using heavy clay or sandy soils. Fertilize your Calathea plant once a month during the growing season, from spring to summer, using a balanced, water-soluble houseplant fertilizer. Dilute the fertilizer to half the recommended strength to prevent overfeeding.
- Pruning and Propagation
Regular pruning is essential to maintain the shape and appearance of your Calathea plant. Remove any yellowing or dead leaves, as they can sap energy from the rest of the plant. You can also trim leggy stems to encourage bushier growth. Calathea plants can be propagated through division. During repotting, gently separate the plant into smaller sections, ensuring each section has roots attached. Plant the divisions in separate pots and provide appropriate care.
- Common Pests and Troubleshooting
Calathea plants can be susceptible to common houseplant pests such as spider mites, mealybugs, and aphids. Regularly inspect your plants for signs of infestation, such as webbing, sticky residue, or small insects. Treat infested plants with organic insecticidal soap or neem oil, following the instructions on the product label. Yellowing leaves, brown leaf tips, or drooping foliage may indicate issues with watering, humidity, or lighting conditions. Adjust these factors accordingly to rectify the problem.
Conclusion
Calathea plants are exquisite additions to any indoor garden, providing a touch of tropical elegance and natural beauty. By understanding their specific care requirements, including proper lighting, watering, humidity, and soil conditions, you can ensure the health and vitality of these captivating plants. Regular maintenance, such as pruning and propagation, will help keep your Calathea plants looking their best. With patience, attention to detail, and a bit of green thumb, you can create a thriving environment for your Calathea plants and enjoy their stunning foliage for years to come.